Showing posts with label Sinful colors. Show all posts

Thursday, December 5, 2013

Neon Waterfall Nails

Man I am a horrible blogger *hangs head in shame* I'm not going to make any promises about the future. I am going to try and get myself to post more, but I guess it will happen when it happens. So on to my nails...

I've been seeing "waterfall" nails for awhile and I finally decided to give it a try. Here is my inspiration:

The Nailasaurus seems to have started this look, I may be wrong but I still love it. If you click the picture it will take you to all of her Waterfall nails and a tutorial. 

Here is my try at it, but first please excuse my dry and ugly cuticle and I missed a little bit of clean up. It was late when I was doing them and I was tired. Please forgive me my sins lol. Ok here goes:

 For the base I used Sinful Colors "Skylark" it is a great polish. The formula was smooth and almost totally opaque in one coat. I did two for good measure.I really like the color, I'm not really sure how to describe it, but I don't like I really have anything else like it in my collection.

  
 Using a striping brush I went through the colors I had picked out and placed random strokes on each nail.

 After I had used each color I went through them again to fill in any gaps I had. The polishes I used were:

 China Glaze "I'm With The Lifeguard" One of my favorite neon greens.

 China Glaze "Hanging In The Balance"

 Essie "The Lace Is On" This is a BEAUTIFUL purple polish. I just loved it even just seeing it as a few strokes on my nails.

 China Glaze "Pool Party"

 Revlon "Hypnotize"

 Sinful Colors "Glimmer"

 After I finished I decided to add a coat of "Northern Lights" topcoat because I love sparkle :)

 All in all I like how it turned out. Both hands turned out a little different. /\ my right hand
\/my left hand
 I like my right hand a little better because I made the stroke a bit longer. The left hand looks like too much of the base color is showing.

I really like how this turned out and I plan on trying it again in the future with different colors. Make sure to check out The Nailasaurus's blog to see some great nails!

Thanks for reading and I hope to post again soon.


Tuesday, June 11, 2013

Mermaid Nails

This is another mani from the vault that I never posted. I went through a lot of pictures and I ended up deleting quite a few manis due to the fact that they were pretty old and clean up wasn't that great, therefore I decided it was best to just delete them. One that made it to see the light of day is my first try at mermaid nails.

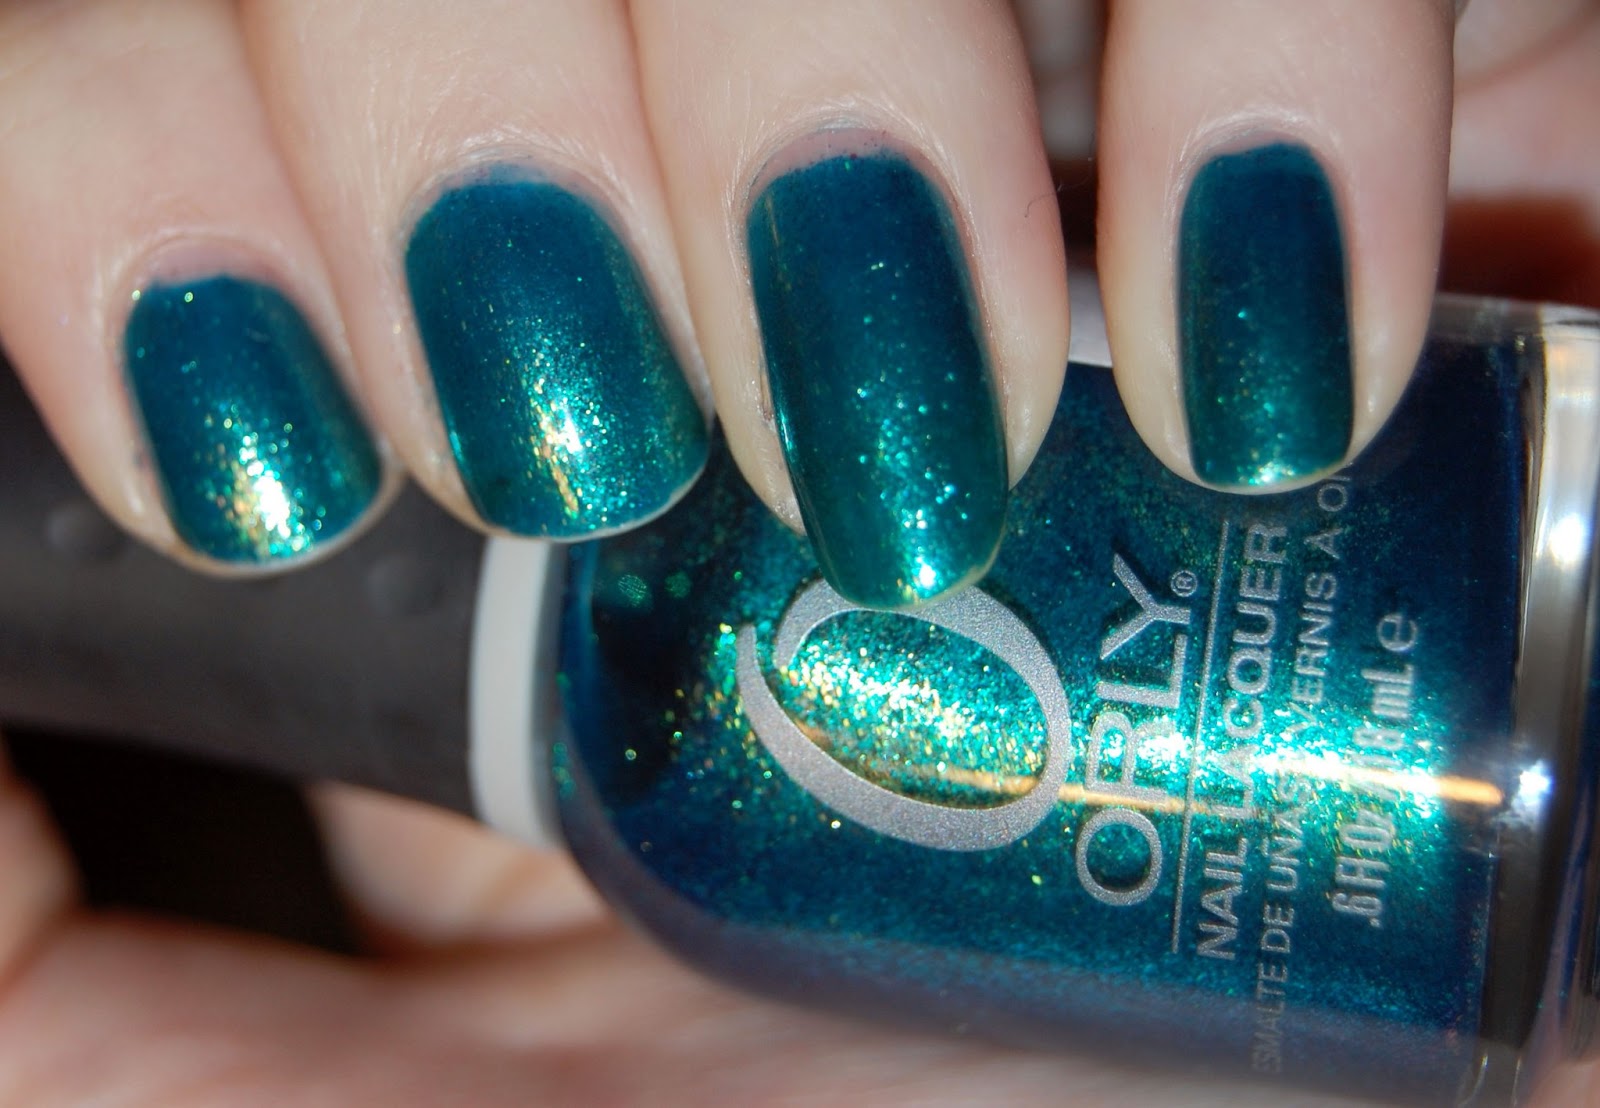
 I started out with 2 coats of Orly "Halley's Comet"

"Halley's Comet" went on smooth and was very opaque. I just love this polish. It really makes me think of a mermaid!

 I then used Sinful Colors "Nail Junkie" on the top 2/3rd's of the nail.

 "Nail Junkie" is a wonderful teal colored jelly polish packed with different size and shades of blue and gold glitters.

I wanted to add a little more gold to my nails so I added a very thin layer of Spoiled "Pirate's Booty" to the entire nail.


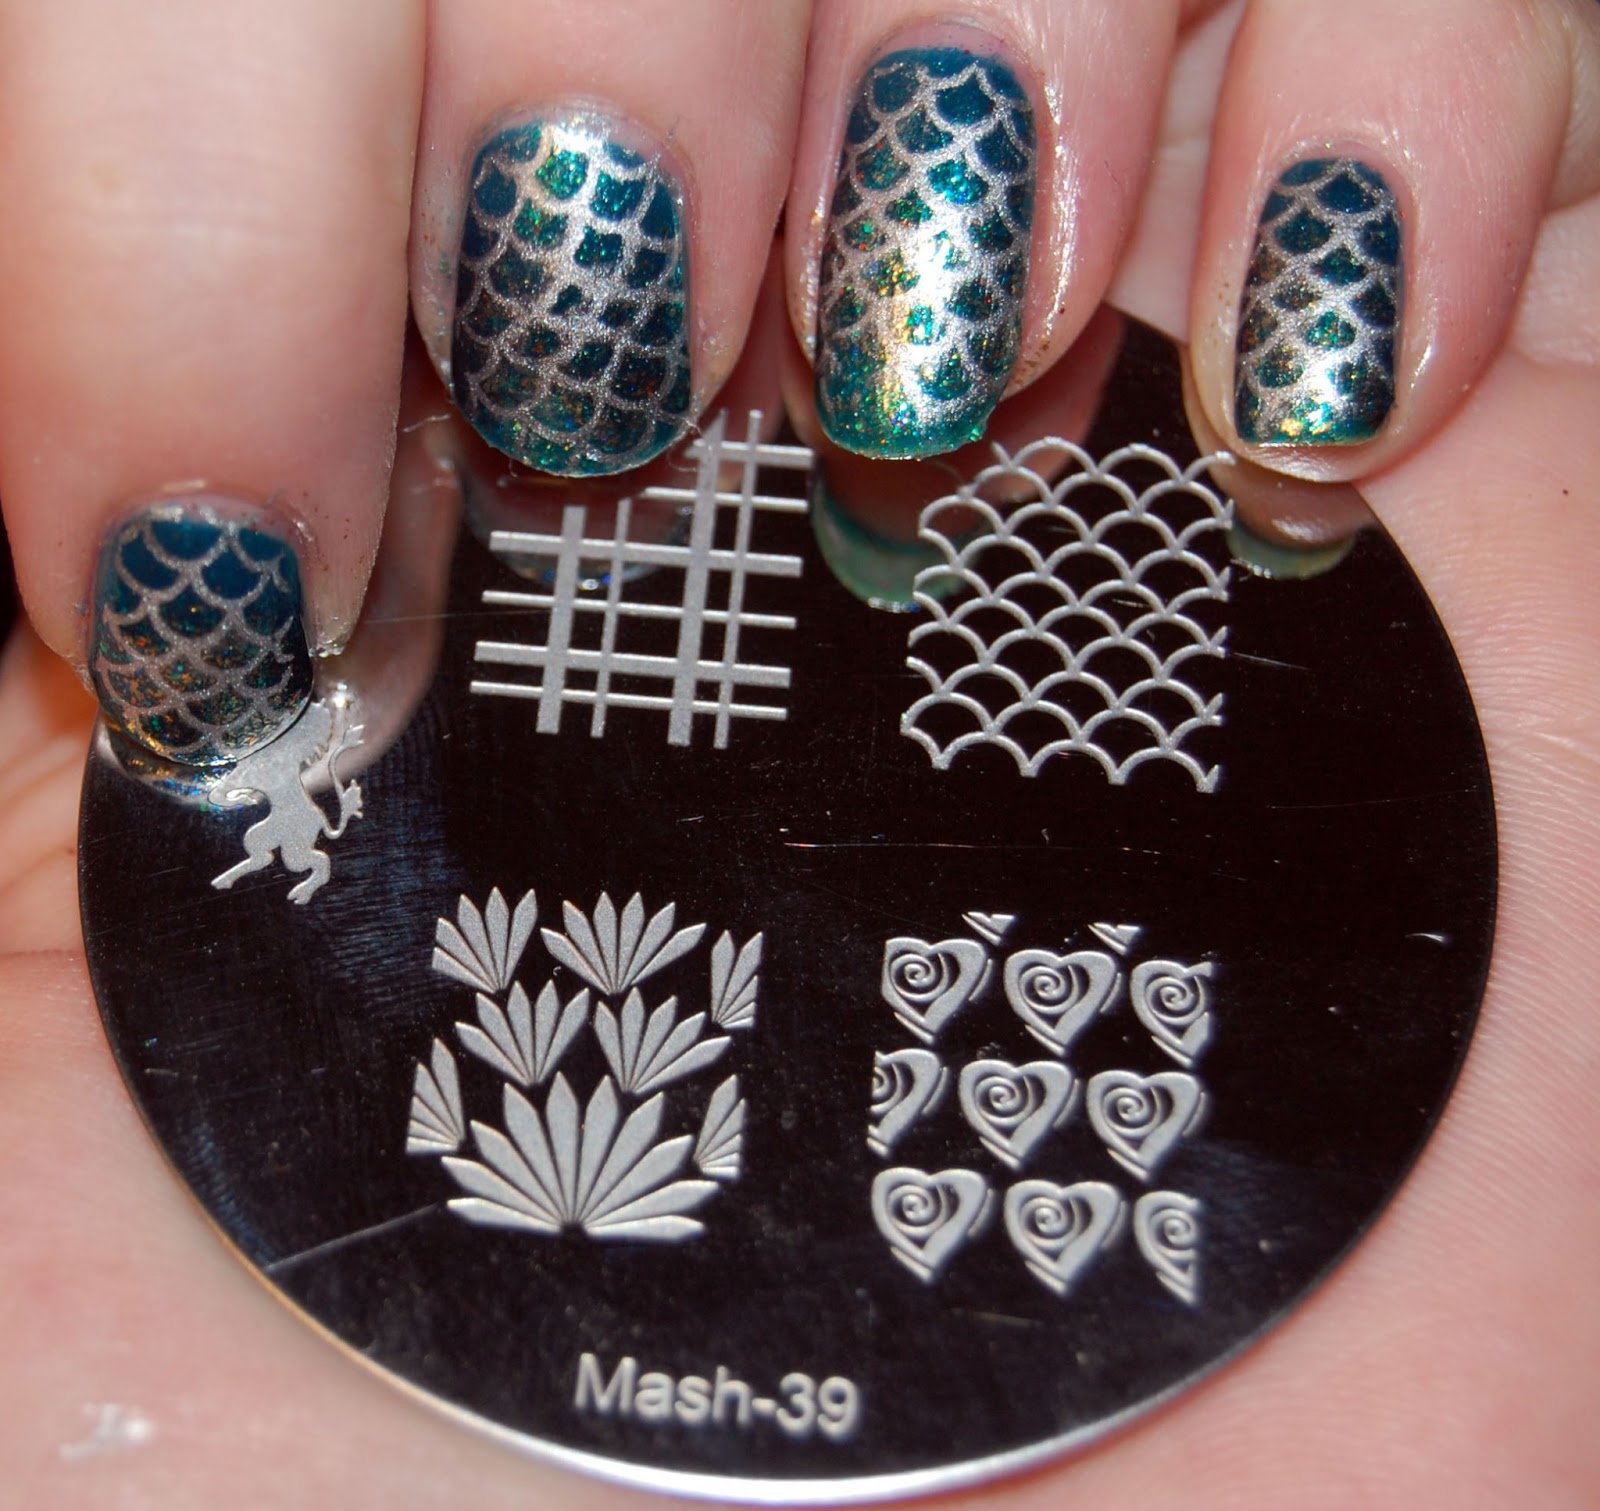
 To make this actually look like a mermaid, I stamped over the nails with a basic silver polish using Mash stamping plate #39.

I really like how this turned out... even though the stamping isn't perfect, but that is my fault, not the plate or polishes fault :)

In the end I am very happy with the end result, but I do plan on trying this one again.

What do you think? Have you tried doing mermaid nails?

Thanks so much for reading. Please keep an eye out for my up coming giveaway. I just want to share  some of my current favorite things. Have a great day!!!

Thursday, February 21, 2013

Blow Me One More Kiss

So without going into it took much, I just ended my relationship with my now ex-fiance. I was depressed but today a song come on that made me feel a bit better and gave me an idea for a mani. The song, if you didn't catch the title, was Pink "Blow Me (One Last Kiss)" Here is what I came out with.

 I started out with 2 coats of Barielle "Night Moves" which I just picked up today at TJ Maxx for $2.00. The coverage is great and the formula was just as good. I don't have a whole lot of polishes from this brand so I was happy to find it, along with a beautiful blue called "Sky's The Limit" also for $2.00

 I decided to layer 2 coats of Sinful Colors "Charmed" which is another polish I bought today at Walgreens for $1.00 using the current coupon. I applied this polish to all of my nails except for my middle fingers hehe. I should have used a glue base, but I wasn't planning on using a glitter polish until I picked it up lol.

 So for my middle finger I stamped kissy lips using 2 KleanColor polishes "Metallic Pink" and....

 and KleanColor "Metallic Red" Both of these worked awesome for stamping!! I have a few other of the metallic ones and can't want to use them for stamping.

 I really like how this turned out and it was better then I pictured in my head. And the kisses on the middle finger is kinda like a farewell to a toxic relationship, even though it still hurts.


I love it! Well that's it for today. I hope to get my tutorial for my polish stands up soon. Ugg I fail so hard, but I took the pictures I just need to write up the post.

Thanks for reading! If you haven't seen the video or heard the song here it is for you, Enjoy!

Wednesday, February 13, 2013

Anti-Valentines Mani

So, I'm not really one for Valentines Day. I've never really had a good one, and I just try to forget about it. I know I'm horrible lol. And the sad part is, I'm even single and I still don't like it. Oh well. Here is my Anti-Valentines manicure.

 I started out with 3 coats of O.P.I. "My Vampire Is Buff" I really wanted to like this polish, but the formula wasn't that great and it took 3 coats to get it some what even. I was hoping it would be a lot better then it was. Oh well moving forward.

For the stamping I used Sinful Colors "Truth Or Dare" and Pure Ice "Black Rage"


 For the stamping images I used one of my new XXL Shany plates, That I just love!!!
I used XXL plate #2


 All of the images except the solid heart are in these rows.

All in all I like how it turned out and I love these new plates, so I think I'm going to be doing a lot more stamping.

I finally took pics for the tutorial on my nail polish racks and I hope to have it up before the weekend.

Well that's all for today. Thanks for reading and I hope you have a good v-day even if I don't lol

Friday, December 21, 2012

Reindeer and Sleigh... Fail :(

Well if your reading this then the world didn't end. I figured as much. anyways, Today is Reindeer and Sleigh nails. Oh my lord, this was such a fail for me. I tried several polishes for stamping and I had to keep removing the stamping because it didn't want to fully transfer. I wanted it turn out so much different they it did. In the end I figured out what the problem was (needed more topcoat to create an even surface for the stamping), and I just gave up and said F it.

 I started out with 2 coats of Revlon "Coastal Surf" what is a pretty sky blue and the application was wonderful.

 Using a makeup sponge I did a gradient using Sinful Colors "Neptune" which is a darker blue with a silver micro glitter. I should have used darker colors to make it look more like a nighttime sky. Looks more like the middle of the day lol.

 I felt like I need a little something more so I added China Glaze "Snow Globe" to the tips of the nails to look like snow fall.

 I ended up using 2 thick coats of topcoat to even it all out.

 These are the plates I used for the stamping.

 I should have used a darker color for the stamping since you can barely see the stamping :( whomp whomp lol.

 I used Sally Hansen "Silver Sweep" for stamping. I really wanted to add a red rhinestone on the pinkie nail for Rudolph, but I didn't have enough room. whomp whomp again!

Oh No!! the present broke in half... I hope Santa has insurance lol.

So yeh total nail fail. Almost didn't want to post, but they can't all be winners. I think the nail failures are when we learn the most. I learned to make sure that my base is always even before stamping, and I need to find more polishes for stamping lol.

Thank you so much for reading and please make sure to check out the other participating below :) 


Sunday, September 30, 2012

Day 30: Inspired By A Tutorial... Last Day!!!

 So here we are, It's the last day of the 30 day challenges. I can't believe I made it and that I didn't miss a day. I had a lot of fun, and I stepped out of my comfort zone a few times. I'm really glad I did this challenge. I now have a few new techniques in my arsenal. All that said, I'm really happy that it's over lol. There were so many days that I wanted to do something that didn't work with the days theme, like I finally bought Ninja Polish "Sticks N Stones" and I've been dying to wear it. Now I'll finally be able to :)
 
Alright enough blah blah blah, and on to the last challenge. Today is "Inspired By A Tutorial." It was kinda funny because I kept looking online to figure out what I was going to do, only to remember that I had already decided. It's been a long weekend. I've been dealing with migraines for the past 2 days.
 
What I decided to do is actually my second go at this technique and the first time wasn't that great, and I figured out a trick on accident from doing yesterday's mani.
 
 Some call it the spun sugar mani or the drizzle... whatever you call it I really like the effect. I started with a base of 2 coats of Sinful Colors "Jungle Trail"
 
 For the "drizzle" I used Wet N Wild "Miami Spirit" and...
 
China Glaze "Under The Boardwalk"
 
 The trick I learned to make this easier was to put a few drops of polish, about 5 or 6, on a palette and to let it sit for a few minutes until it starts drying. Then using a dotting tool mix it around and, Volia!, stringy polish!
 
 I really like how it turned out but I still felt like it needed a little sparkle :)
 
 So I added a coat of Northern Lights :)
 
This time it turned out a lot better the my first try... which you can find here.
 
 I guess the second time is a charm for me on this one. Now that I know how to do it I know I'll be doing it again in the future. It is a pretty messy and time consuming technique, but I think it is worth it.
 
Well that ends the 30 day challenge! Thank you so much for reading and following my progress. This has really gotten me into the routine of blogging a lot more then I use to and I am going to try and keep it up. I don't know if I will do every day, but I will do more then a couple times a month.
 
Don't forget to check out the other ladies below, and again thanks so much for reading and following my blog.