I know that it has taken me forever to get this posted. I first showed a picture in this post Handmade Polish Stands and it looks like this:


I love these stands and I made them to fit on top of my melmers. You can change the sizes to fit where ever you want to put them. I have 2 that I've had since my original post back in October, and they are filled. They have shown no signs of weakening or anything. So these are very sturdy.
Alright here we go:
I started with a foam board that I bought at the Dollar Store and I used hot glue to secure everything. Here are the pieces and their measurements that you need to cut.

For the 2 main pieces which I cut out first were the back side and the base. You can make these any size you wish and pretty much the only thing you have to change is the length of the shelf pieces shown below.

I found that adding edges to the sides help to keep the bottles from sliding over the edge. Gotta protect those bottles. :)

To start putting everything together I start with gluing the shelf pieces together. You have to make sure that you put them all together the same way otherwise things won't line up correctly. Make sure that the side shelf piece it laid on top of the top shelf piece, here is a close up of what I mean

Make sure that all the shelves are put together the same way. After gluing each piece together and pressing them together with a little pressure, I like to add another layer of the glue and I run my finger over it to kinda spread it out. Don't worry you won't burn your finger it will just stick a little harden. I find it fun to peel it off lol.

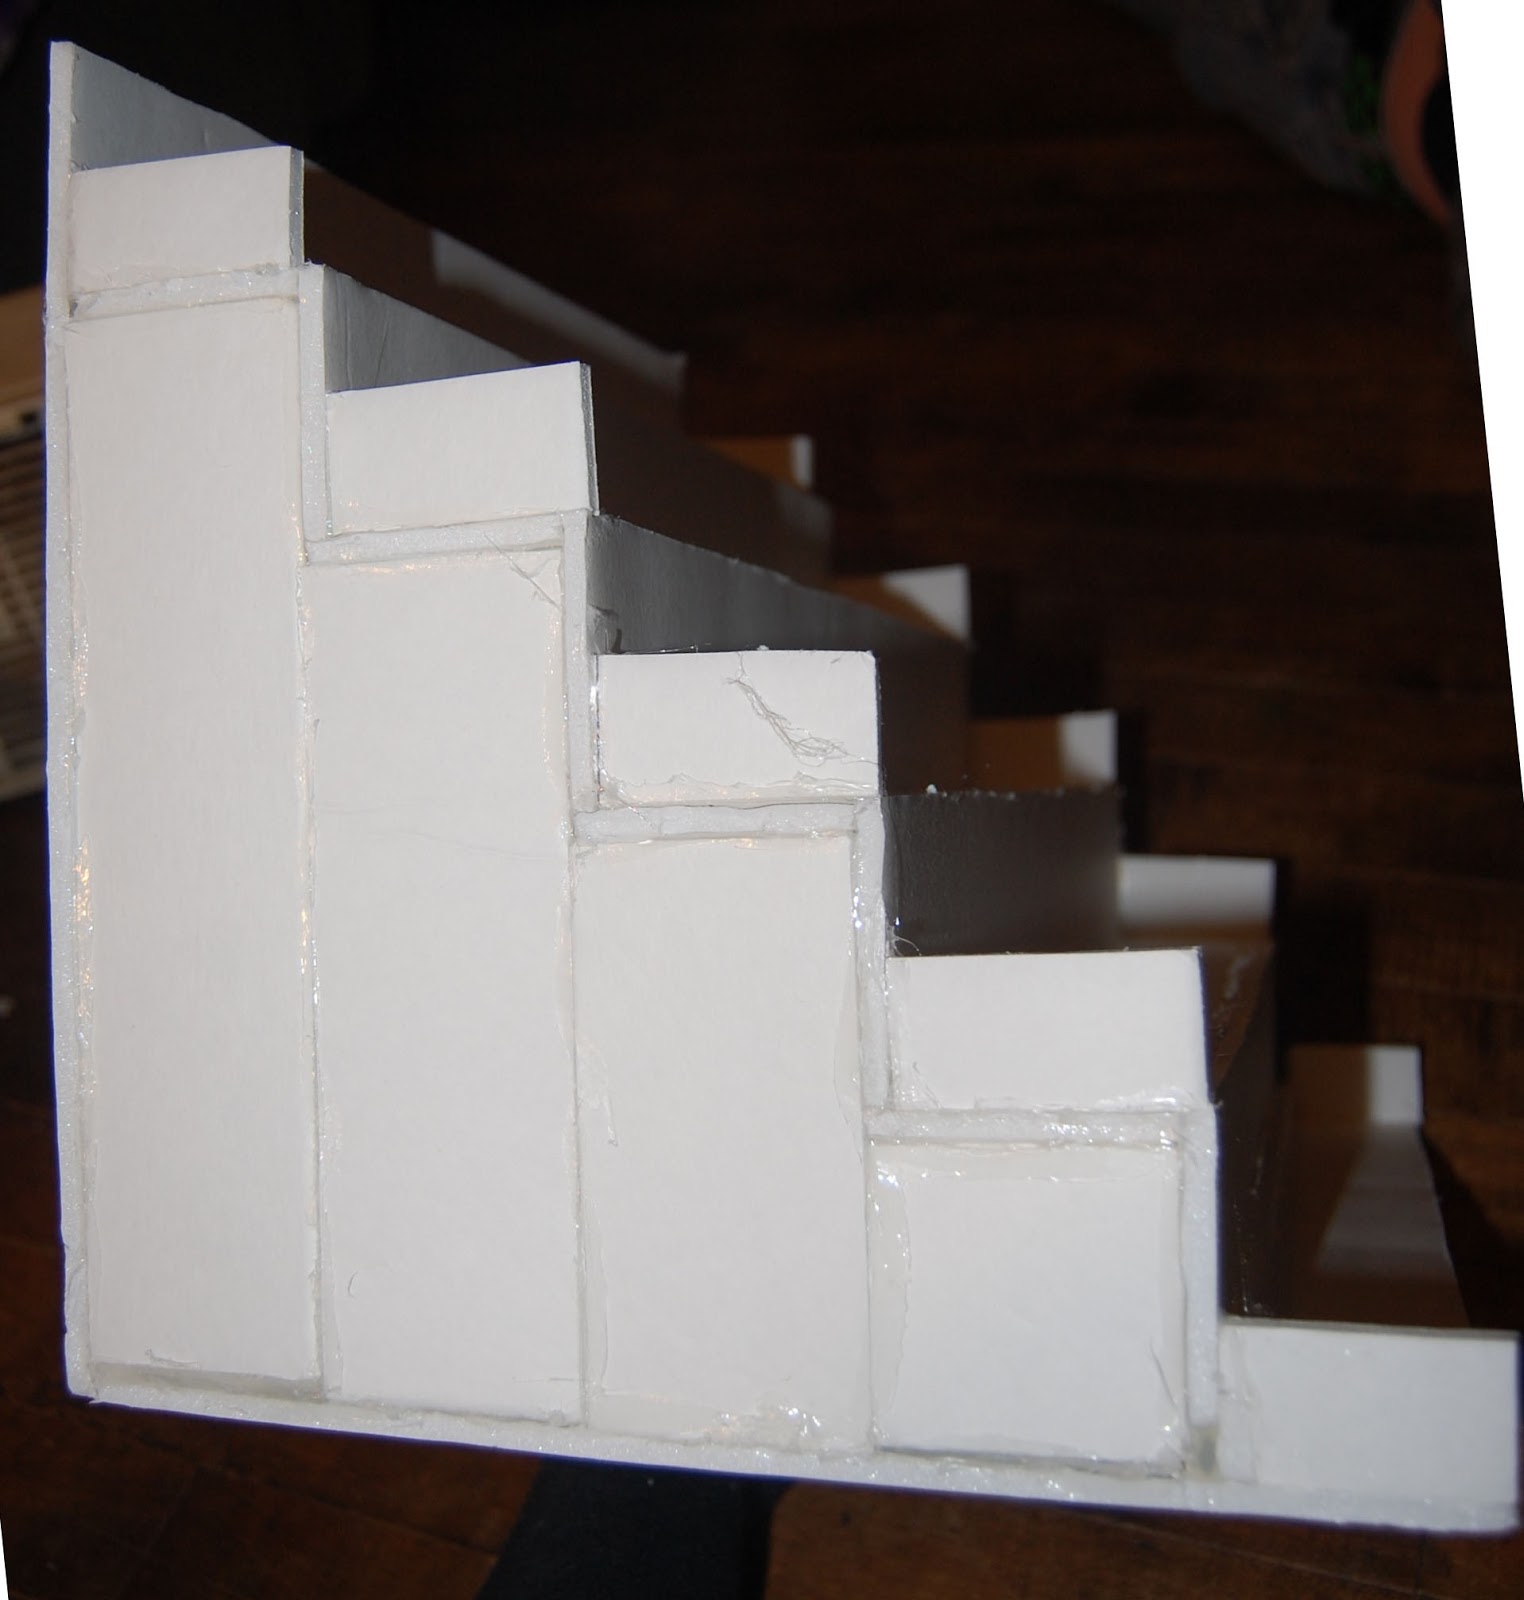
Once you have all the shelves then you have to glue them all together and you will get something that looks like the above. When you glue them together, make sure that they are all sitting the same way and that you glue them together with the side piece on top of the top of the shelf below it. You will get what looks like a staircase.

Next you will glue on the side pieces. I find it easier to start with the bottom shelf and then work your way up. If you wanted to make this one solid piece I'm sure you could do that, but I just found it to line up better and make gluing easier since hot glue hardens somewhat quickly.

Option: I didn't take a picture of this but I added a piece on the under side of the stair part to create a little more support and to also push the side out since they do pull towards each other a little. Plus this makes lining up the base and back piece with the stairs.
I then glue the staircase to the bottom base .To do this just line up the back edge with the back sides of the stairs, that creates the bottom shelf.
The second to the last step is to attach the back piece, this attaches everything together and creates the back of the top shelf.
The very last thing to attach is the edges to keep the bottles from sliding off the sides. I also ran a couple lines of hot glue over the shelves and smoothed them with my finger. I did this so the bottles would have something to kinda stick to and not slide of the front of the shelves. Another option it to add some grippy shelf liner to keep the bottles from moving. Once this is done you can pretty much do what ever you want to decorate them.
You know have your own homemade nail polish stand and it really only costs about $2.00 (maybe a little more if you don't already have a hot glue gun, and if you want to buy something to dress it up.)
There you have it. If you have any questions about this tutorial please feel free to ask. I will answer them, just leave it in the comments section below. I hope this makes sense. If you make a stand using this tutorial please feel free to share pictures, or links to blog posts, in the comments section.
Thanks for reading! Have fun!
I love the way that these turned out. I am really thinking about building these. Keep up the great work.
ReplyDeleteI love your little white helper sitting with you...
DeleteThe first one takes the longest, but once you do one they are a lot easier to do, plus you can always make them smaller or larger depending on what you want. Yeh my pups are always around and sometimes they make it in pictures and I don't always notice until I'm editing.
DeleteIf you do make one let me know how it goes!
Thanks! Would love to have a rack but don't want to spend more money. I bet my 7 year old would love to help me make these! I'll let you know how they turned out.
ReplyDeleteI love your ittle one in the background checking on your work. Looks like my Vinny.
ReplyDeleteSuper facil, barato, sencillo y supeeeer útil!, gracias por el tutorial!
ReplyDeleteMe encantó tu blog!
TE SIGO, espero puedas pasar por el mio también. Un beso.
http://solamentemujeres.blogspot.com.ar/
Oh really nice idea and so useful!
ReplyDeleteXOXO
Arianna
http://aryannastyle.blogspot.it/
https://www.facebook.com/AryannaStyle